
Fabric Pencil: Complete Guide to Marking Tools for Sewing Projects
Master Precise Fabric Marking with the Right Tools and Techniques
Fabric pencils transform sewing projects from guesswork into precision work by creating clear temporary markings that guide cuts, seams, and design placement.
Choosing the right fabric pencil makes the difference between clean professional results and visible marks that won’t wash out or faded lines you can’t see while working.
What Makes Fabric Pencils Different from Regular Pencils
Fabric pencils use special formulas designed to mark textiles without damaging fibers or leaving permanent stains. The pigments bond temporarily to fabric surfaces creating visible lines that remove easily with water or heat depending on the pencil type.
Regular pencils contain graphite that embeds into fabric weave permanently making marks nearly impossible to remove completely. Fabric pencils avoid this problem using clay-based or wax-based cores that sit on fabric surfaces rather than penetrating deep into fibers.
Water-Soluble Fabric Pencils
Water-soluble pencils create marks that disappear completely when dabbed with water or washed making them perfect for temporary guidelines. The pigment dissolves on contact with moisture leaving no trace on finished projects even on light-colored or delicate fabrics.
These pencils work best for marking seam allowances, dart placements, and cutting lines that need to stay visible during construction but must vanish before wearing or displaying. Always test on fabric scraps first since some treated or coated fabrics resist water-soluble marks or make removal difficult.
Air-Soluble Marking Pencils
Air-soluble pencils fade naturally over time disappearing within 24 to 48 hours without any washing or treatment. This automatic removal prevents forgotten marks from becoming permanent but requires working quickly since guidelines won’t last through long projects.
Use air-soluble pencils for quick alterations, temporary fitting marks, or same-day projects where you’ll complete the work before marks fade. Keep backup marking methods ready for complex projects that take multiple days since faded lines force you to remark areas mid-project.
Chalk-Based Fabric Pencils
Chalk pencils create bold visible lines on dark fabrics where other marking tools disappear against the background color. The powdery marks brush away easily with your hand or a soft cloth making them ideal for fabrics that shouldn’t get wet during construction.
These pencils work perfectly for marking leather, suede, velvet, and other fabrics where moisture causes damage or permanent texture changes. The marks may smudge if touched repeatedly so mark carefully and avoid running your hands over marked areas until you’re ready to remove them.
Clover Water Soluble Pencil Set – White, Pink & Blue
Professional-grade water-soluble marking pencils offering three essential colors for marking different fabric tones with perfect visibility. The fine tips create precise lines for detailed pattern work while the smooth formula glides across fabric without snagging or pulling delicate fibers. Marks vanish completely with a damp cloth or through regular washing leaving no residue or ghost lines on finished projects making these pencils trusted tools for professional seamstresses and quilters worldwide.
- Three color options for any fabric shade
- Fine precision tips for detailed marking
- Complete water-soluble removal
- Smooth application without fabric damage
- Works on cotton, linen, and synthetics
- Professional quality construction
- No ghost marks after washing
How to Use Fabric Pencils Correctly
Proper technique ensures clear visible marks that remove cleanly without damaging fabric or leaving permanent impressions. Always work on a smooth hard surface that supports the fabric preventing stretching or distortion as you mark.
Testing Before Marking Your Project
Test every fabric pencil on scrap pieces from your actual project fabric before marking pattern pieces. Some fabric treatments, finishes, or dye types react unexpectedly with certain pencil formulas making marks difficult or impossible to remove completely.
Mark a test line using normal pressure then remove it using the manufacturer’s recommended method checking for any remaining traces. If marks don’t remove completely try a different pencil type or alternative marking method before risking your project fabric.
Applying the Right Amount of Pressure
Light to medium pressure creates visible lines without compressing fabric fibers or leaving permanent indentations. Heavy pressure damages delicate fabrics creating grooves that remain visible even after pencil marks wash away.
Let the pencil’s pigment do the marking work rather than pressing hard trying to create darker lines. If lines aren’t visible enough switch to a different color pencil that contrasts better with your fabric rather than applying more pressure.
Marking Different Fabric Types
Cotton and linen take fabric pencil marks easily with clear visible lines that remove predictably. Use any pencil type on these natural fibers choosing colors that contrast well with the fabric shade for best visibility.
Silk and delicate fabrics require extra-fine pencil points and feather-light pressure preventing permanent impressions in the weave. Water-soluble pencils work best since they remove without rubbing or aggressive cleaning that damages fragile fibers.
Synthetic fabrics like polyester and nylon have slick surfaces that resist some pencil types. Test multiple options finding one that marks clearly without skipping then mark using slightly firmer pressure than you’d use on natural fibers.
Dark fabrics need white or yellow pencils creating enough contrast to see marks clearly under normal lighting. Chalk-based pencils often show up brightest on dark materials making them the go-to choice for black, navy, or deep colored fabrics.
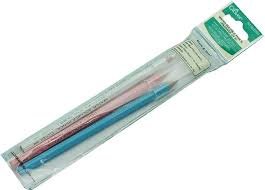
Singer Measure & Mark Combo Kit with Fabric Pencils

Complete marking and measuring solution combining water-soluble fabric pencils with a 120-inch flexible tape measure covering all essential marking needs in one convenient kit. The blue and white pencils provide color options for both light and dark fabrics while the extra-long tape measure handles large projects like quilts and drapes without constantly repositioning. This practical combination puts accurate measuring and precise marking tools together eliminating the need to search for separate tools when moving between measuring and marking tasks during project construction.
- Two water-soluble pencils included
- 120-inch flexible tape measure
- Blue pencil for light fabrics
- White pencil for dark fabrics
- Complete measure and mark solution
- Compact storage in one package
- Perfect for all sewing projects
Removing Fabric Pencil Marks Safely
Following proper removal methods prevents damage while ensuring marks disappear completely from finished projects. Always use the removal method that matches your pencil type since wrong techniques can set marks permanently into fabric.
Water-Soluble Pencil Removal
Dab water-soluble marks with a damp white cloth working from the outside edges toward the center preventing pigment from spreading. Cold water works best for initial removal since hot water can sometimes set certain pigments into fabric fibers.
For stubborn marks soak the marked area in cool water for several minutes then gently rub using circular motions. Regular machine washing during normal laundering removes any remaining traces once the project is complete.
Air-Soluble Mark Removal
Air-soluble marks fade naturally within 24 to 48 hours requiring no special treatment or washing. Speed up fading by placing the marked fabric in a well-ventilated area with good air circulation helping moisture in the marks evaporate faster.
Avoid storing projects with air-soluble marks for extended periods since incomplete fading can leave faint traces. Complete your project and wash it within the fading timeframe ensuring all marks disappear completely before the item goes into regular use.
Chalk Mark Removal
Brush chalk marks away gently using your hand or a soft fabric brush removing the powdery pigment without grinding it into fabric weave. Work with light strokes in one direction preventing chalk from embedding deeper into fibers.
For marks that resist brushing use a slightly damp cloth with gentle dabbing motions avoiding excessive rubbing. Fabric chalk marks may leave faint traces on very textured fabrics but these usually disappear during the first washing.
Pro Tip: Always mark on the wrong side of fabric whenever possible keeping any stubborn traces hidden inside seams or on surfaces that won’t show in the finished project. This backup approach protects you even if marks don’t remove as completely as expected.
Common Fabric Pencil Mistakes to Avoid
Understanding common marking errors helps you avoid problems that waste fabric or create permanent damage. Most mistakes come from rushing the marking process or skipping simple testing steps.
Skipping the Test Step
Marking directly on project fabric without testing removal on scraps causes disaster when marks won’t come out. Every fabric reacts differently to marking tools making testing essential even if you’ve used the same pencil successfully on different fabric before.
Cut small scraps from your project fabric edges or seam allowances using these pieces for mark testing. This ensures you’re testing the exact same fabric composition and finish that you’ll mark on pattern pieces.
Using Expired or Dried Out Pencils
Old fabric pencils create faint inconsistent marks that fade too quickly or become difficult to see under normal lighting. The pigments dry out over time losing their ability to transfer cleanly onto fabric surfaces.
Replace fabric pencils annually if you sew regularly or when you notice marks becoming lighter or harder to apply smoothly. Store pencils in cool dry places away from direct sunlight preventing premature drying and extending their useful life.
Marking With Too Much Pressure
Heavy-handed marking creates permanent grooves in fabric even after the visible pigment washes away. These indentations catch light differently than surrounding fabric showing as faint lines or shadows in finished garments.
Practice on scraps finding the lightest pressure that creates visible marks then use that same touch on your project. If you struggle to see light marks improve your lighting rather than pressing harder with the pencil.
Leaving Marks Too Long Before Removal
Marks left on fabric for weeks or months before washing may set into fibers making removal difficult or impossible. Even water-soluble pencils can become permanent if exposed to heat, direct sunlight, or certain fabric treatments during extended storage.
Complete projects promptly after marking and wash finished items soon after construction finishes. Store works-in-progress away from heat and light protecting marks from conditions that make them harder to remove later.
Choosing the Right Fabric Pencil for Your Project
Different projects need different marking tools based on fabric type, project timeline, and visibility requirements. Matching the pencil to your specific needs ensures marks stay visible during work but vanish completely when you’re done.
For Quick Same-Day Projects
Air-soluble pencils work perfectly for alterations and quick projects you’ll complete within hours. The automatic fading prevents forgotten marks from requiring removal but limits how long you can take finishing the work.
These pencils suit busy sewers who work in focused sessions completing projects from start to finish in single sittings. Keep water-soluble backups ready for when projects take longer than expected.
For Long-Term Projects
Water-soluble pencils give you unlimited working time since marks stay visible until you actively remove them. This flexibility supports complex projects that take days or weeks to complete without worrying about fading guidelines.
Choose water-soluble options for quilting projects that involve multiple cutting and piecing sessions. The marks remain clear through all construction steps washing away cleanly when the quilt is finished.
For Dark or Dense Fabrics
White or yellow chalk pencils create bold marks visible on black, navy, dark brown, and other deep colored fabrics. The high contrast makes marks easy to see under any lighting conditions preventing cutting or sewing mistakes from invisible guidelines.
Stock both white and yellow pencils testing which shows up better on your specific dark fabric. Some blacks and navies respond better to yellow while others show white more clearly depending on their exact dye composition.
For Delicate or Special Fabrics
Fine-tip water-soluble pencils work best on silk, satin, velvet, and other delicate fabrics where moisture won’t cause problems. The precise points create accurate marks without requiring pressure that damages fragile weaves.
Avoid chalk pencils on velvet or fabrics with pile since powdery marks embed into texture making removal difficult. Test multiple pencil types on fabric scraps choosing the one that marks cleanly and removes without leaving any traces.
Storing and Maintaining Fabric Pencils
Proper storage extends pencil life keeping them ready for accurate marking whenever you need them. Simple care habits prevent common problems like dried pigments and broken tips.
Keeping Pencils Sharp
Sharp tips create precise marks especially important for detailed pattern work and small garment components. Dull points make thick blurry lines that create inaccurate cutting or sewing reducing finished project quality.
Use regular pencil sharpeners designed for soft-lead pencils since standard sharpeners often break fabric pencil tips. Sharpen frequently maintaining fine points that mark exactly where you intend without thick lines that span multiple fabric threads.
Storage Conditions
Store fabric pencils in cool dry places away from direct sunlight and heat sources. High temperatures dry out pigments causing pencils to apply unevenly or create marks that fade too quickly during use.
Keep pencils in closed containers or pouches preventing dust accumulation on tips. Clean tips with soft cloth before each use ensuring dust or debris doesn’t transfer onto fabric creating unexpected marks.
Testing Stored Pencils
Test pencils on scraps before starting new projects especially if they’ve been stored unused for several months. Pigments change over time affecting how marks apply and remove even when pencils look perfectly fine externally.
Replace pencils that create inconsistent marks, require heavy pressure for visibility, or leave traces after proper removal. Quality marking tools cost little compared to ruined project fabric making replacement worthwhile when performance declines.
Alternative Marking Methods
While fabric pencils work for most projects some situations benefit from different marking approaches. Understanding alternatives helps you choose the best method for unusual fabrics or special requirements.
Tailor’s Chalk
Traditional tailor’s chalk comes in wedge shapes or wheels creating quick bold marks on any fabric color. The chalk brushes away easily making it perfect for temporary guidelines on fabrics where pencils don’t show up well or might leave traces.
Chalk works wonderfully on wool, coating fabrics, and textured materials where pencil marks get lost in surface variation. The thick marks aren’t suitable for detailed work but excel at marking straight seam lines and cutting guides.
Fabric Markers
Water-soluble fabric markers create bold lines visible from farther away than pencil marks. The flowing ink covers more area quickly making them efficient for marking large pattern pieces or long seam lines.
Choose markers over pencils when working on floors or large tables where you need to see marks from standing position. The bolder lines also help when working in dimmer lighting where fine pencil marks disappear.
Tracing Paper and Wheels
Dressmaker’s carbon paper combined with tracing wheels transfers marks without direct drawing on fabric. This method works perfectly for transferring complex pattern markings including darts, pleats, and pocket placements in one pass.
Use tracing paper methods on fabrics where surface marking might cause damage or when you need to transfer identical markings to multiple fabric layers simultaneously. The wheel creates small dots following pattern lines rather than continuous drawn lines.
Thread Basting
Temporary hand stitching marks fabric without any chemicals or pigments making it perfect for heirloom projects or expensive materials. Thread marks never cause fabric damage and remove by simply pulling out the stitches when no longer needed.
Choose thread basting for marking vintage fabrics, wedding gowns, or irreplaceable materials where any marking tool risk seems too high. The method takes more time than pencil marking but provides absolute safety for precious fabrics.
Where to Buy Quality Fabric Pencils
Finding reliable fabric pencils means shopping at retailers who stock quality sewing notions and understand crafter needs. Multiple shopping options give you flexibility choosing between immediate in-store pickup or wider online selection.
Joann Fabrics Stores
Joann carries trusted fabric pencil brands in both physical stores and online providing access to water-soluble, chalk, and specialty marking tools. The notions department stocks various color options helping you find pencils that contrast well with any fabric shade.
Store staff can answer questions about different pencil types helping beginners choose appropriate options for their first projects. Watch for sales and coupon offers making it affordable to stock multiple pencil types for different fabric situations.
Specialty Sewing Retailers
Independent fabric stores and quilting shops often carry premium marking tools not found in chain stores. These retailers focus on quality over price stocking professional-grade pencils that justify higher costs through superior performance and longevity.
Staff at specialty stores typically sew themselves bringing practical experience to their product recommendations. Ask for advice about specific fabric marking challenges benefiting from expertise that comes from years of hands-on sewing.
Online Sewing Supply Stores
Web-based sewing retailers offer extensive selections with detailed product descriptions and customer reviews. Browse multiple brands comparing features and prices finding the best value for your specific needs without driving between stores.
Online shopping works well for stocking up on favorite pencils you’ve already tested buying multiple colors or backup sets. Read customer reviews carefully since they reveal real-world performance details not covered in manufacturer descriptions.
Frequently Asked Questions
Regular pencils should not be used on fabric because the graphite core creates permanent marks that won’t wash out. The graphite embeds into fabric fibers making removal nearly impossible even with aggressive washing or chemical treatments. Fabric pencils use special formulas designed specifically to mark temporarily then disappear completely when removed properly. The small cost difference between regular and fabric pencils makes choosing the right tool worthwhile protecting your project fabric from permanent marking mistakes.
Water-soluble pencil marks remain visible indefinitely until exposed to moisture staying clear through weeks or months of project work when kept dry. The marks only begin fading when they contact water through washing, steam pressing, or intentional removal with damp cloths. This permanence until removal makes water-soluble pencils ideal for long-term projects where marks need to stay visible through multiple work sessions. Always test removal on scraps before extended storage since some fabric treatments or environmental conditions may affect how completely marks wash away after long periods.
White or yellow fabric pencils provide the best visibility on dark colored fabrics creating high contrast marks you can see clearly under any lighting. White shows up well on most dark fabrics including black, navy, and dark brown while yellow often appears brighter on some black fabrics depending on their dye composition. Test both colors on scraps from your specific dark fabric choosing whichever creates more visible marks. Chalk-based pencils in these light colors typically show up brightest on very dark or dense fabrics where other marking tools disappear against the background.
Fabric pencil marks can potentially set into fabric if left for extended periods especially when exposed to heat, direct sunlight, or certain fabric treatments. Water-soluble marks that normally wash out easily may become difficult or impossible to remove after weeks or months of exposure to these conditions. Complete projects promptly after marking and wash finished items soon after construction to ensure marks remove completely. Store works-in-progress in cool dark places away from heat sources protecting marks from conditions that could make them permanent. Always test removal on project scraps before long-term storage confirming marks will still wash out after the storage period.
Fabric pencils work on most common sewing fabrics but performance varies depending on fabric texture, finish, and fiber content. Cotton, linen, and basic woven fabrics accept pencil marks easily with predictable removal while synthetic fabrics with slick surfaces may require testing multiple pencil types. Treated fabrics with water-repellent or stain-resistant finishes sometimes resist water-soluble marks or make removal difficult requiring alternative marking methods. Always test pencils on scraps from your actual project fabric checking both marking visibility and complete removal before marking pattern pieces. Some special fabrics like leather, vinyl, or heavily napped materials work better with alternative marking tools designed specifically for those surfaces.
Sharpen fabric pencils using standard pencil sharpeners designed for soft-lead pencils rotating the pencil gently while applying light pressure. The soft cores in fabric pencils break easily if you force them into tight sharpeners or twist aggressively during sharpening. Some fabric pencil brands include small sharpeners designed specifically for their pencil size and core hardness providing the safest sharpening option. Keep tips sharp for precise detailed marking since dull points create thick blurry lines that reduce marking accuracy. Sharpen frequently during large projects maintaining fine points that create exact lines where you intend without spanning multiple fabric threads.
Fabric pencils create fine precise lines ideal for detailed pattern marking and small garment components while fabric markers make bolder flowing lines visible from farther away. Pencils require sharpening to maintain fine tips whereas markers provide consistent line width until the ink runs out. Pencil marks typically appear lighter and more subtle making them suitable for work that needs delicate guidelines while marker lines show up boldly helping when you need to see marks from standing positions or in dimmer lighting. Both types usually offer water-soluble removal though you should test removal on fabric scraps regardless of which marking tool you choose for your project.
Related Resources
- Fabric Chalk – Alternative marking tool that brushes away easily from fabric surfaces
- Fabric Markers – Bold marking tools for visible lines on large projects
- Fabric Scissors – Sharp cutting tools for following marked lines accurately
- Tape Measure – Essential measuring tool for accurate marking placement
- Fabric Rotary Cutter and Mat – Cutting system for following straight marked lines
- Markers for Sewing – Complete guide to different marking tool options
- Fabric Iron – Heat pressing tool that can set or remove certain marks
- Joann Fabrics Sewing Machines – Machines for following marked sewing lines
- Fabric Clips – Hold marked fabric layers together during sewing
- Grey Marker – Neutral tone marker for mid-range fabric colors
- Markers for Jeans – Marking tools designed for denim and heavy fabrics
- Fabric Stencils – Create repeated design marks for decorative projects
Start Marking with Confidence
Fabric pencils transform your sewing from guesswork into precision work giving you clear guidelines that make every cut and seam accurate.
Testing pencils on fabric scraps before marking pattern pieces prevents disasters while building confidence in your marking tool choices.
Stock multiple pencil types and colors building a marking tool collection that handles any fabric situation. Quality fabric scissors, accurate measuring tools, and reliable marking pencils form the foundation of successful sewing projects.